RCAMS Light Setup Guide
Table of Contents
Overview
This guide walks you through the process of setting up RCAMS (Residential Community Alert Mounted Strobe) light devices using the Android setup application. RCAMS lights are designed to provide visual emergency notifications throughout your facility.
Note: Before beginning the setup process, ensure you have created the necessary district, school, group, and WiFi settings in the RCAMS Portal.
Requirements
Before you begin, make sure you have the following:
Setup Requirements
- An Android device with the RCAMS Setup App installed
- RCAMS light hardware powered on and in setup mode (solid white light)
- WiFi connection available for the light device
- RCAMS administrator account credentials
- The light device should be physically installed at its intended location
Setup Steps
Follow these steps to set up your RCAMS light device:
How to Enter Setup Mode: To put your RCAMS light in setup mode, power off the device using the large red button. Then, press and hold the small red button while turning the device back on by pressing the large red button once. When in setup mode, the battery lights will flash off once every 5 seconds. If the battery lights flash off twice every 5 seconds, it means the light was previously configured but cannot connect to WiFi or the RCAMS servers.
Step 1: Login to the RCAMS Setup App
Open the RCAMS Setup App on your Android device and login with your RCAMS administrator credentials.
- Enter your email address
- Enter your password
- Tap the Login button
These credentials are the same ones you use to access the RCAMS Portal.

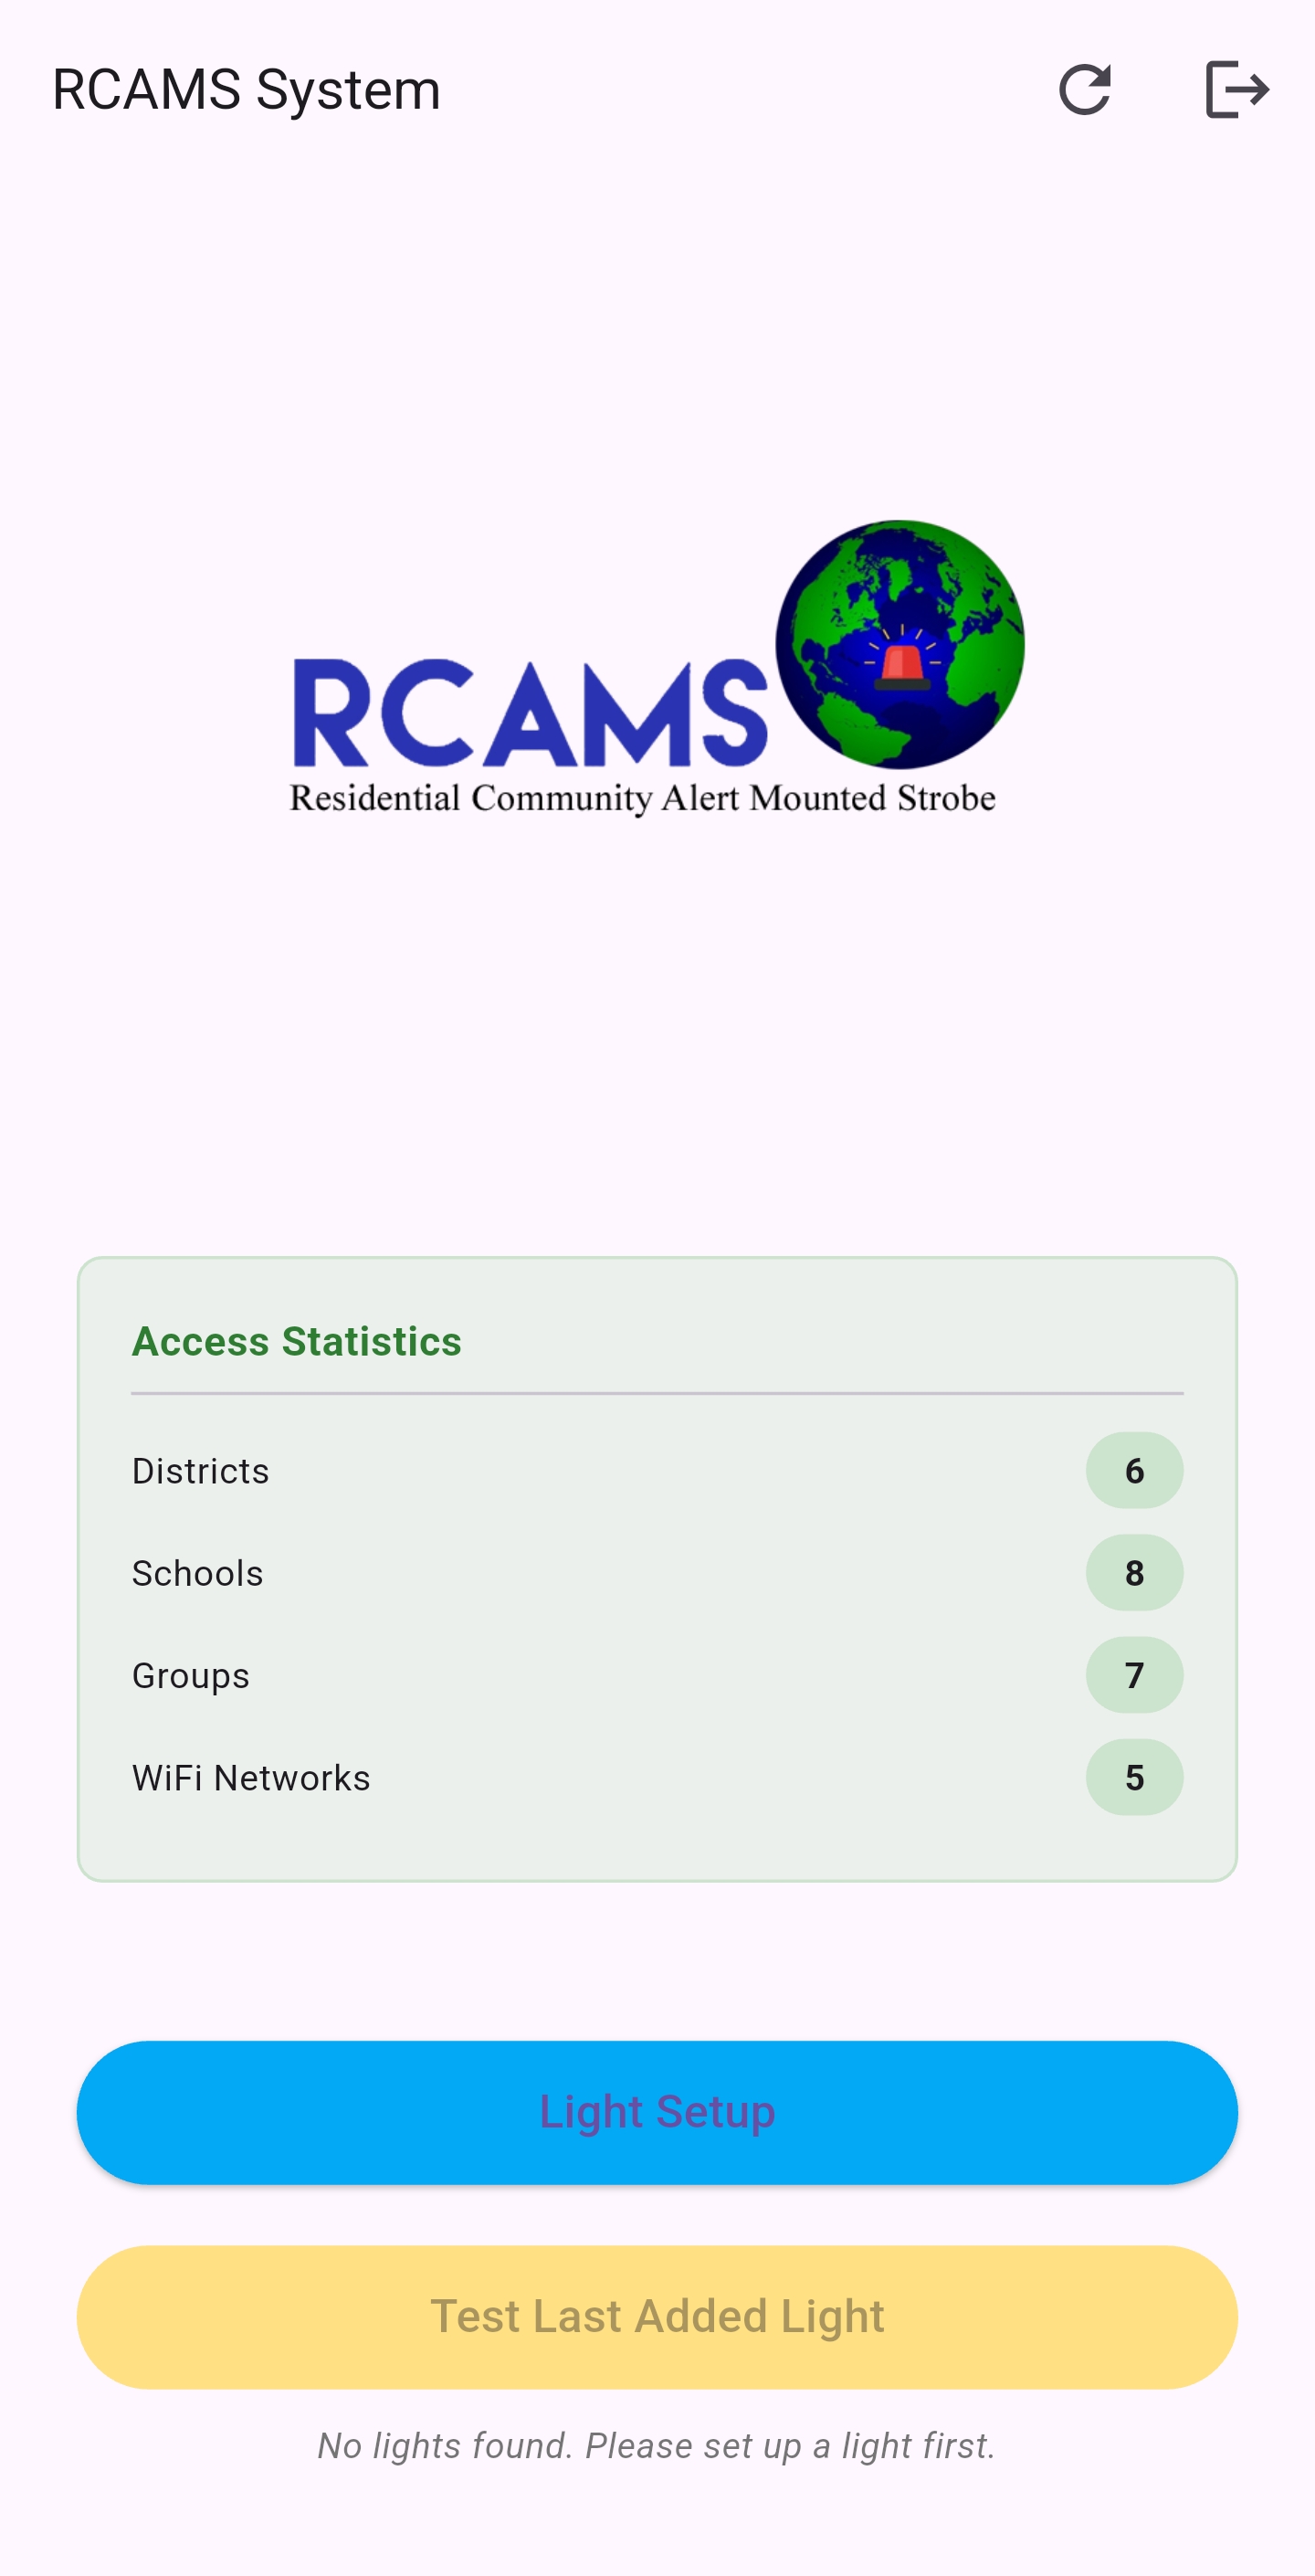
Step 2: Welcome Screen
After successful login, you'll see the welcome screen.
- Review the available options
- Tap on "Light Setup" to begin configuring a new RCAMS light device
From this screen, you can also access previously configured lights or adjust settings.
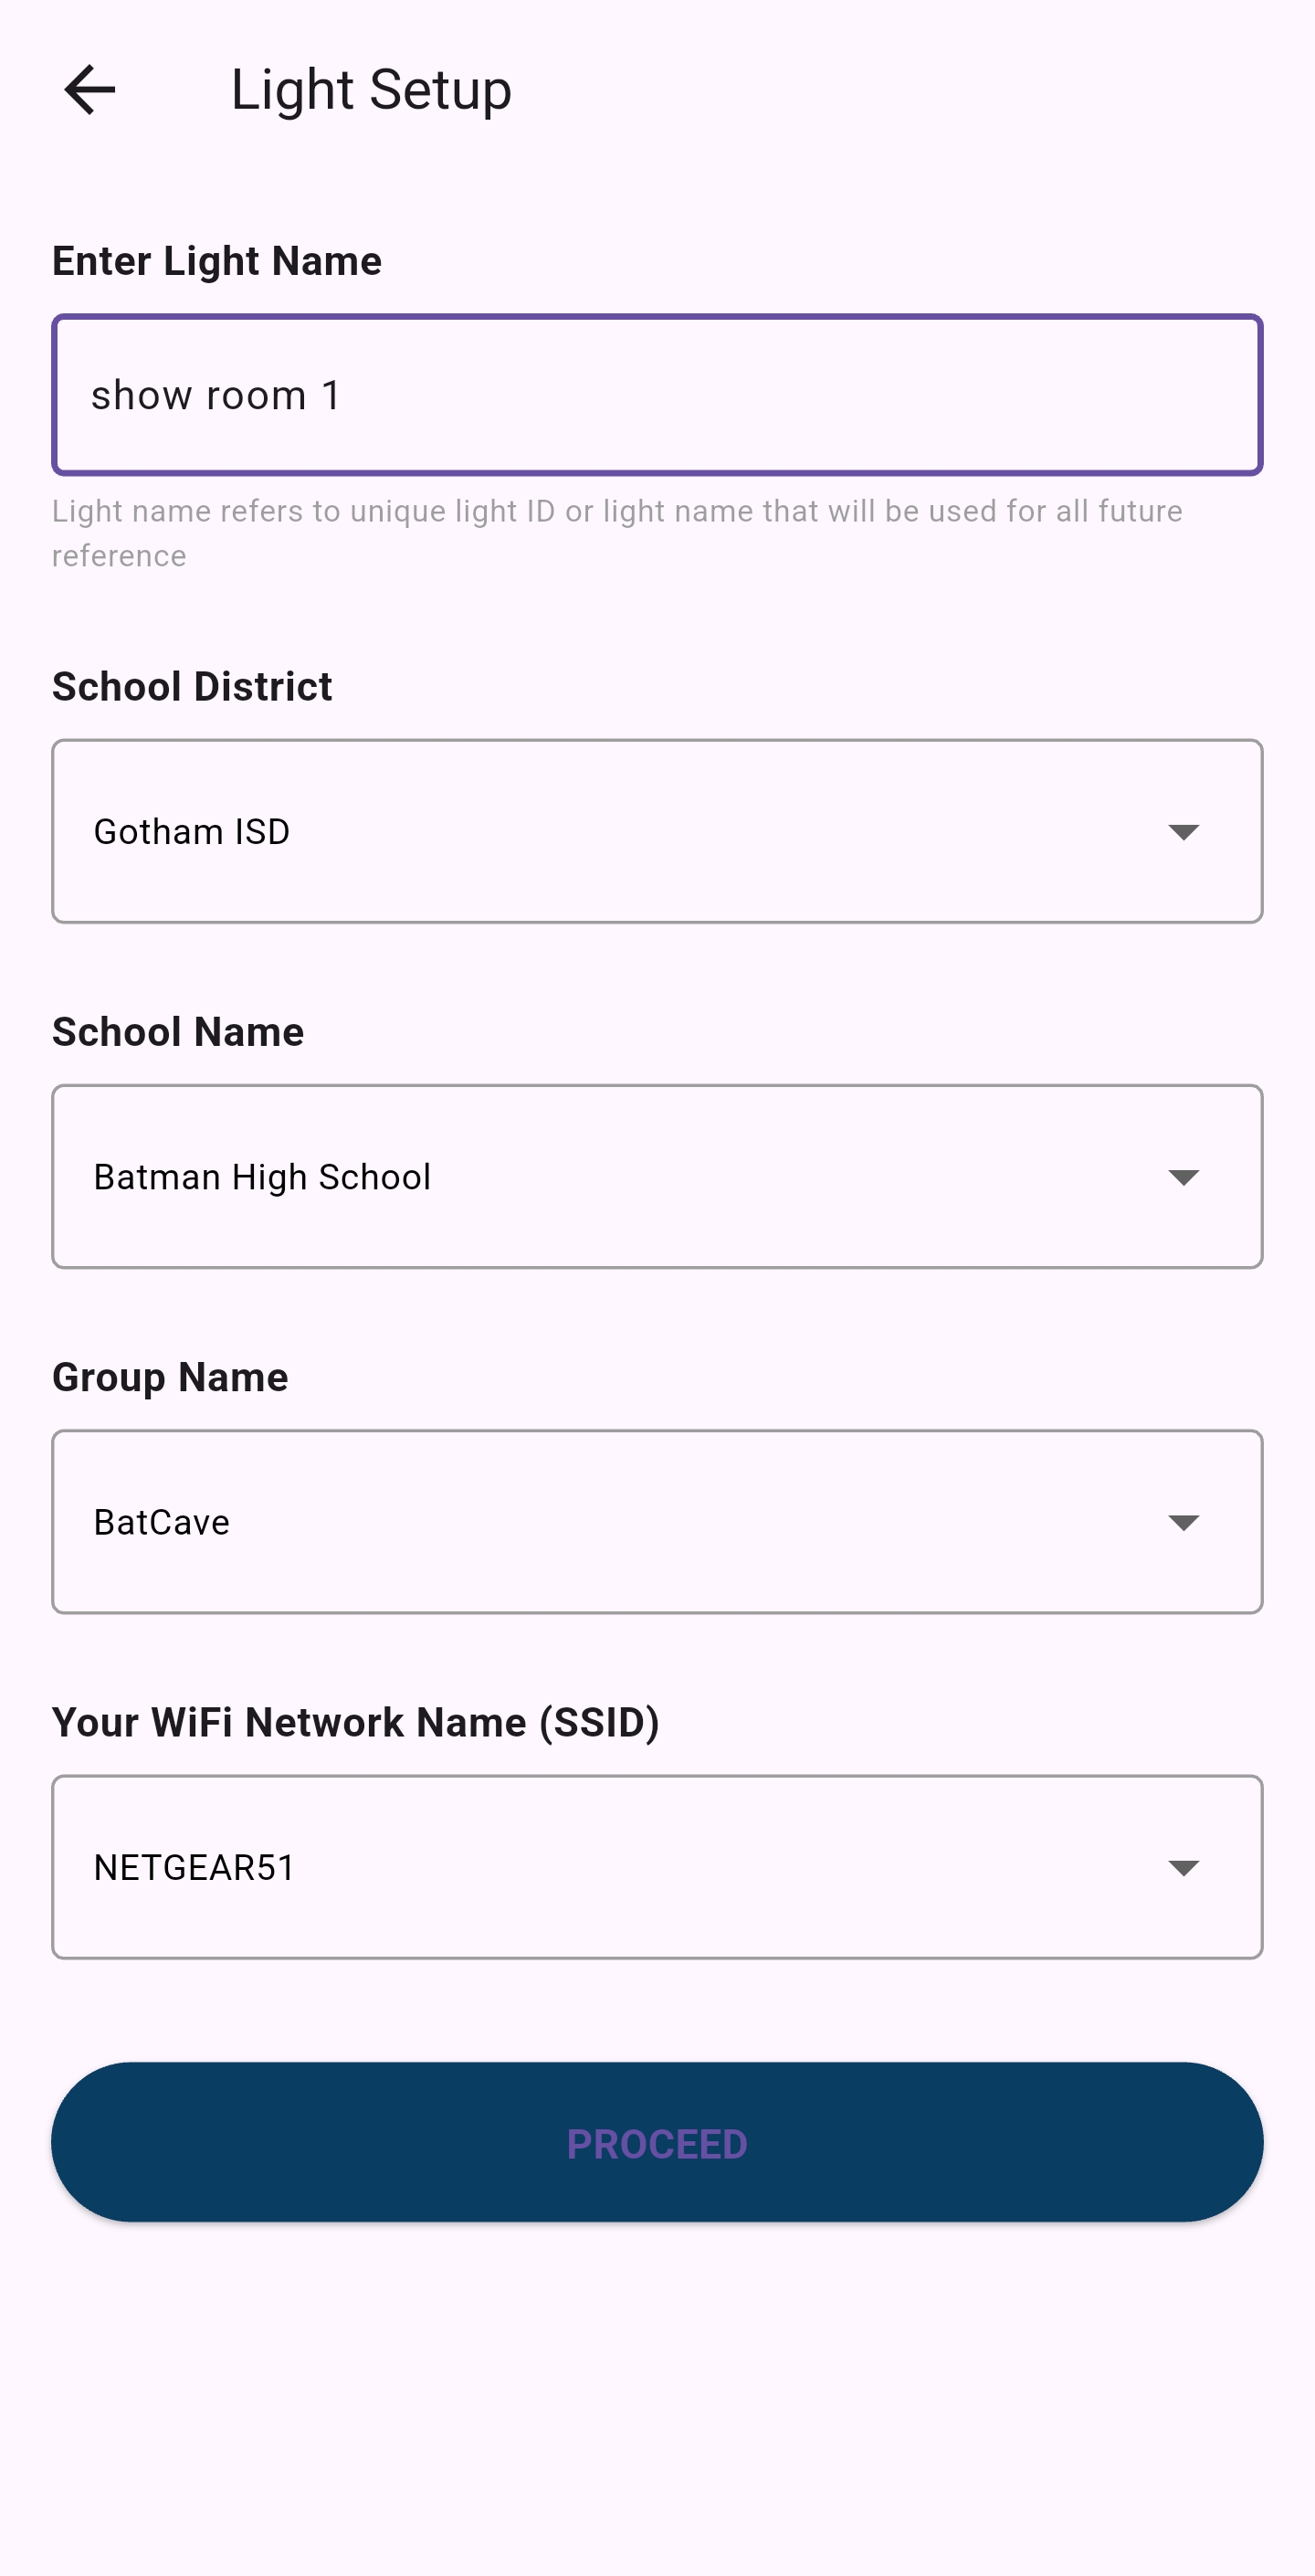
Step 3: Light Setup Form
Fill out the Light Setup Form with the required information:
- Enter a name for the light (e.g., "Hallway 1", "Main Office")
- Select the District this light belongs to
- Select the School within that district
- Select the Group within that school
- Select the WiFi network the light will connect to
- Tap "Proceed" to continue
Give your light a unique, descriptive name that clearly identifies its location. Consider including room numbers or area names to make it easily identifiable in the system.
Note: If you don't see your District, School, Group, or WiFi Network in the dropdown menus, you'll need to create these items first in the RCAMS Portal before proceeding.
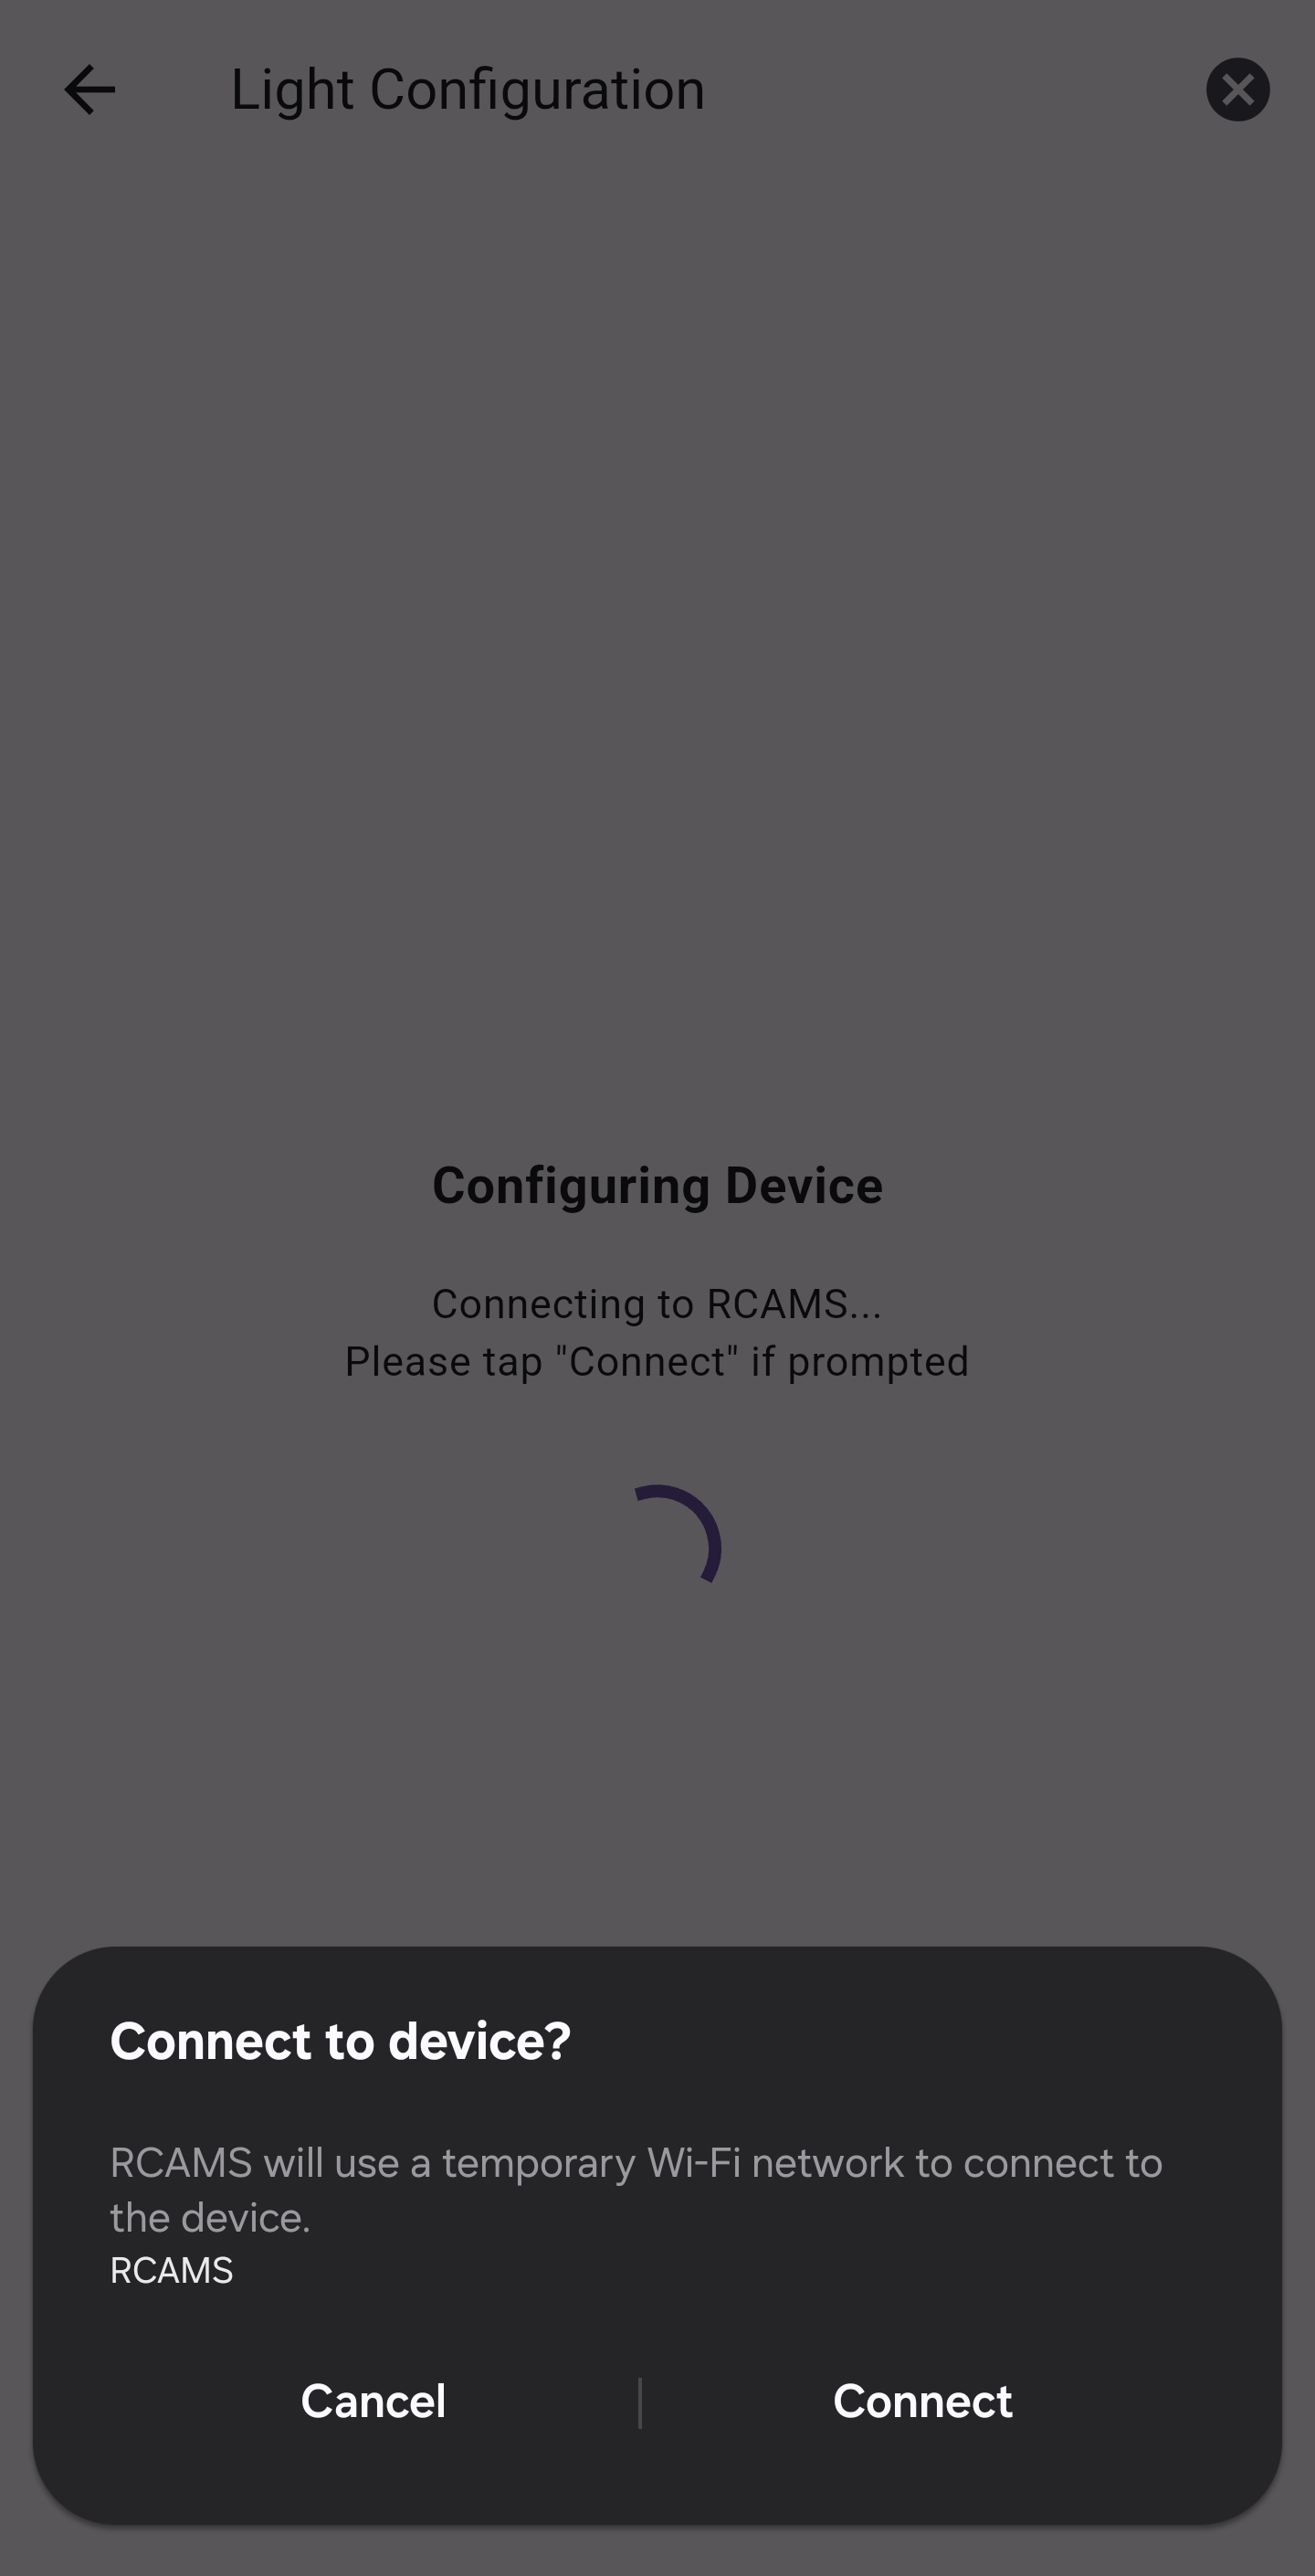
Step 4: Initial Connection
The app will attempt to connect to the RCAMS light device:
- Ensure your light is in setup mode (battery lights flash once every 5 seconds)
- The app will search for the light's WiFi signal
- Tap "Connect" when prompted to connect to the device
- Once connected, it will retrieve the MAC address from the light
This MAC address is used to uniquely identify the light in the RCAMS system. Note that only one light should be in setup mode at a time, otherwise the app might connect to a different light than intended.

Step 5: Device Configuration
After retrieving the MAC address, the app configures the light device:
- The MAC address is registered with the RCAMS server
- Configuration data is prepared for the light
- You may be prompted to connect again during this process
The app will automatically send the configuration to the light device.
Step 6: Configuration Submission
The app submits the configuration to the light device:
- WiFi network information is sent to the light
- RCAMS server details are configured
- Group and identification information is stored
The light will attempt to connect to your WiFi network using the provided credentials.
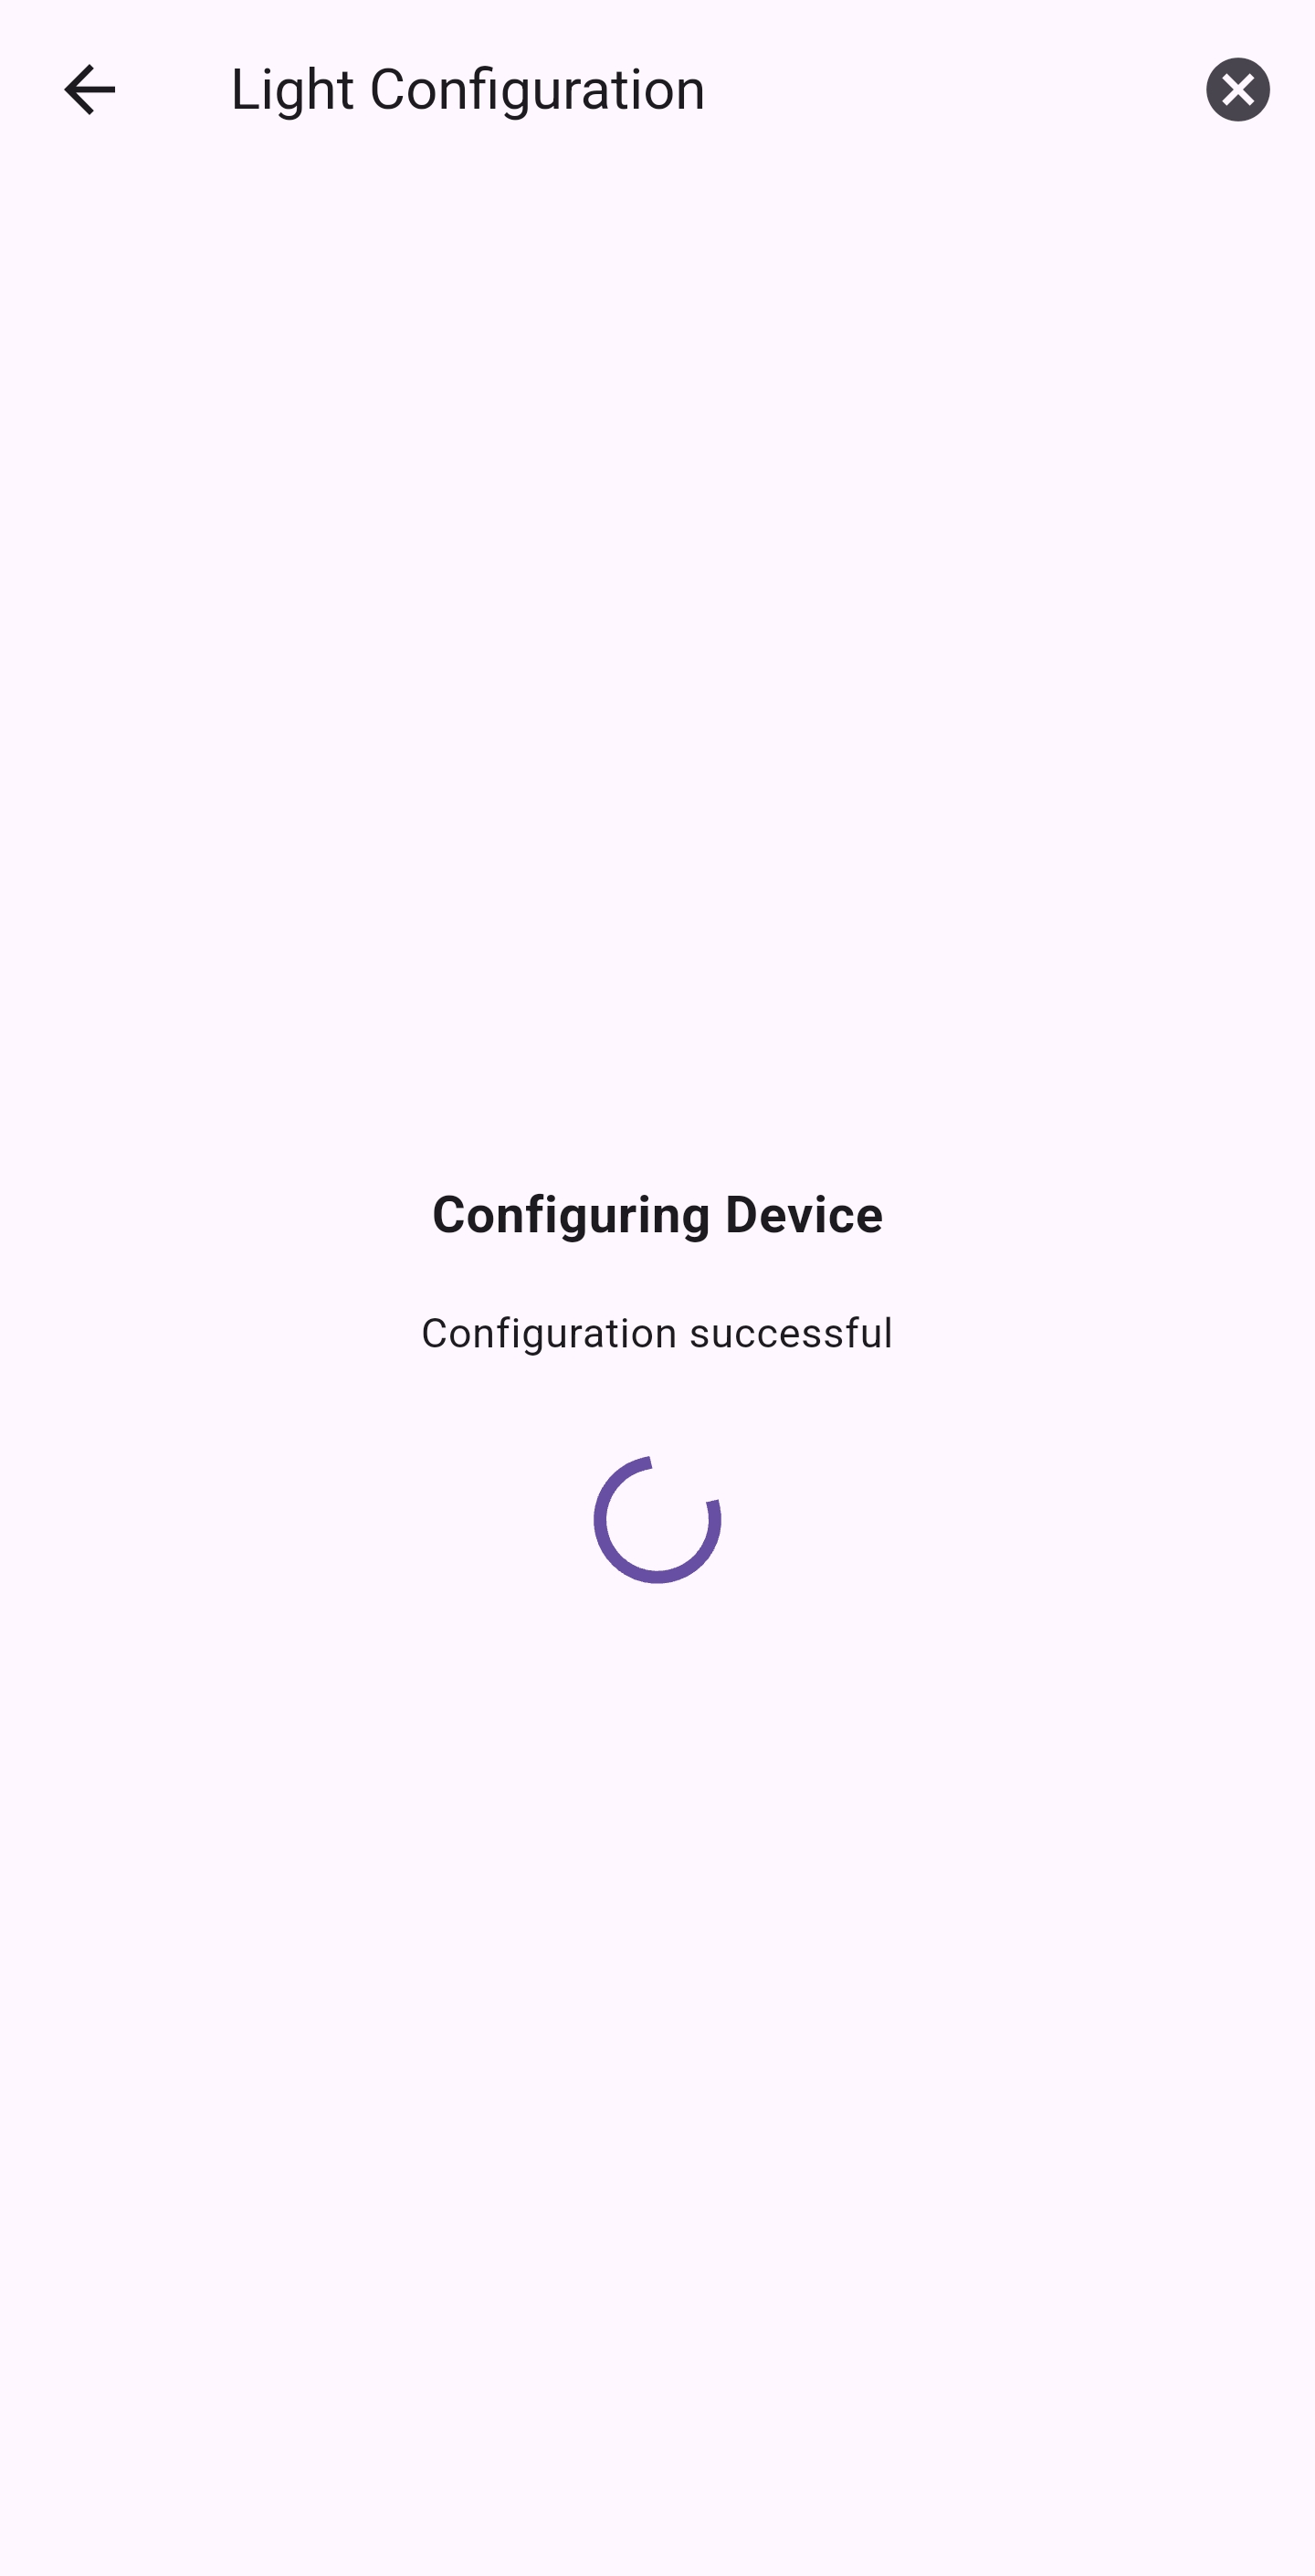
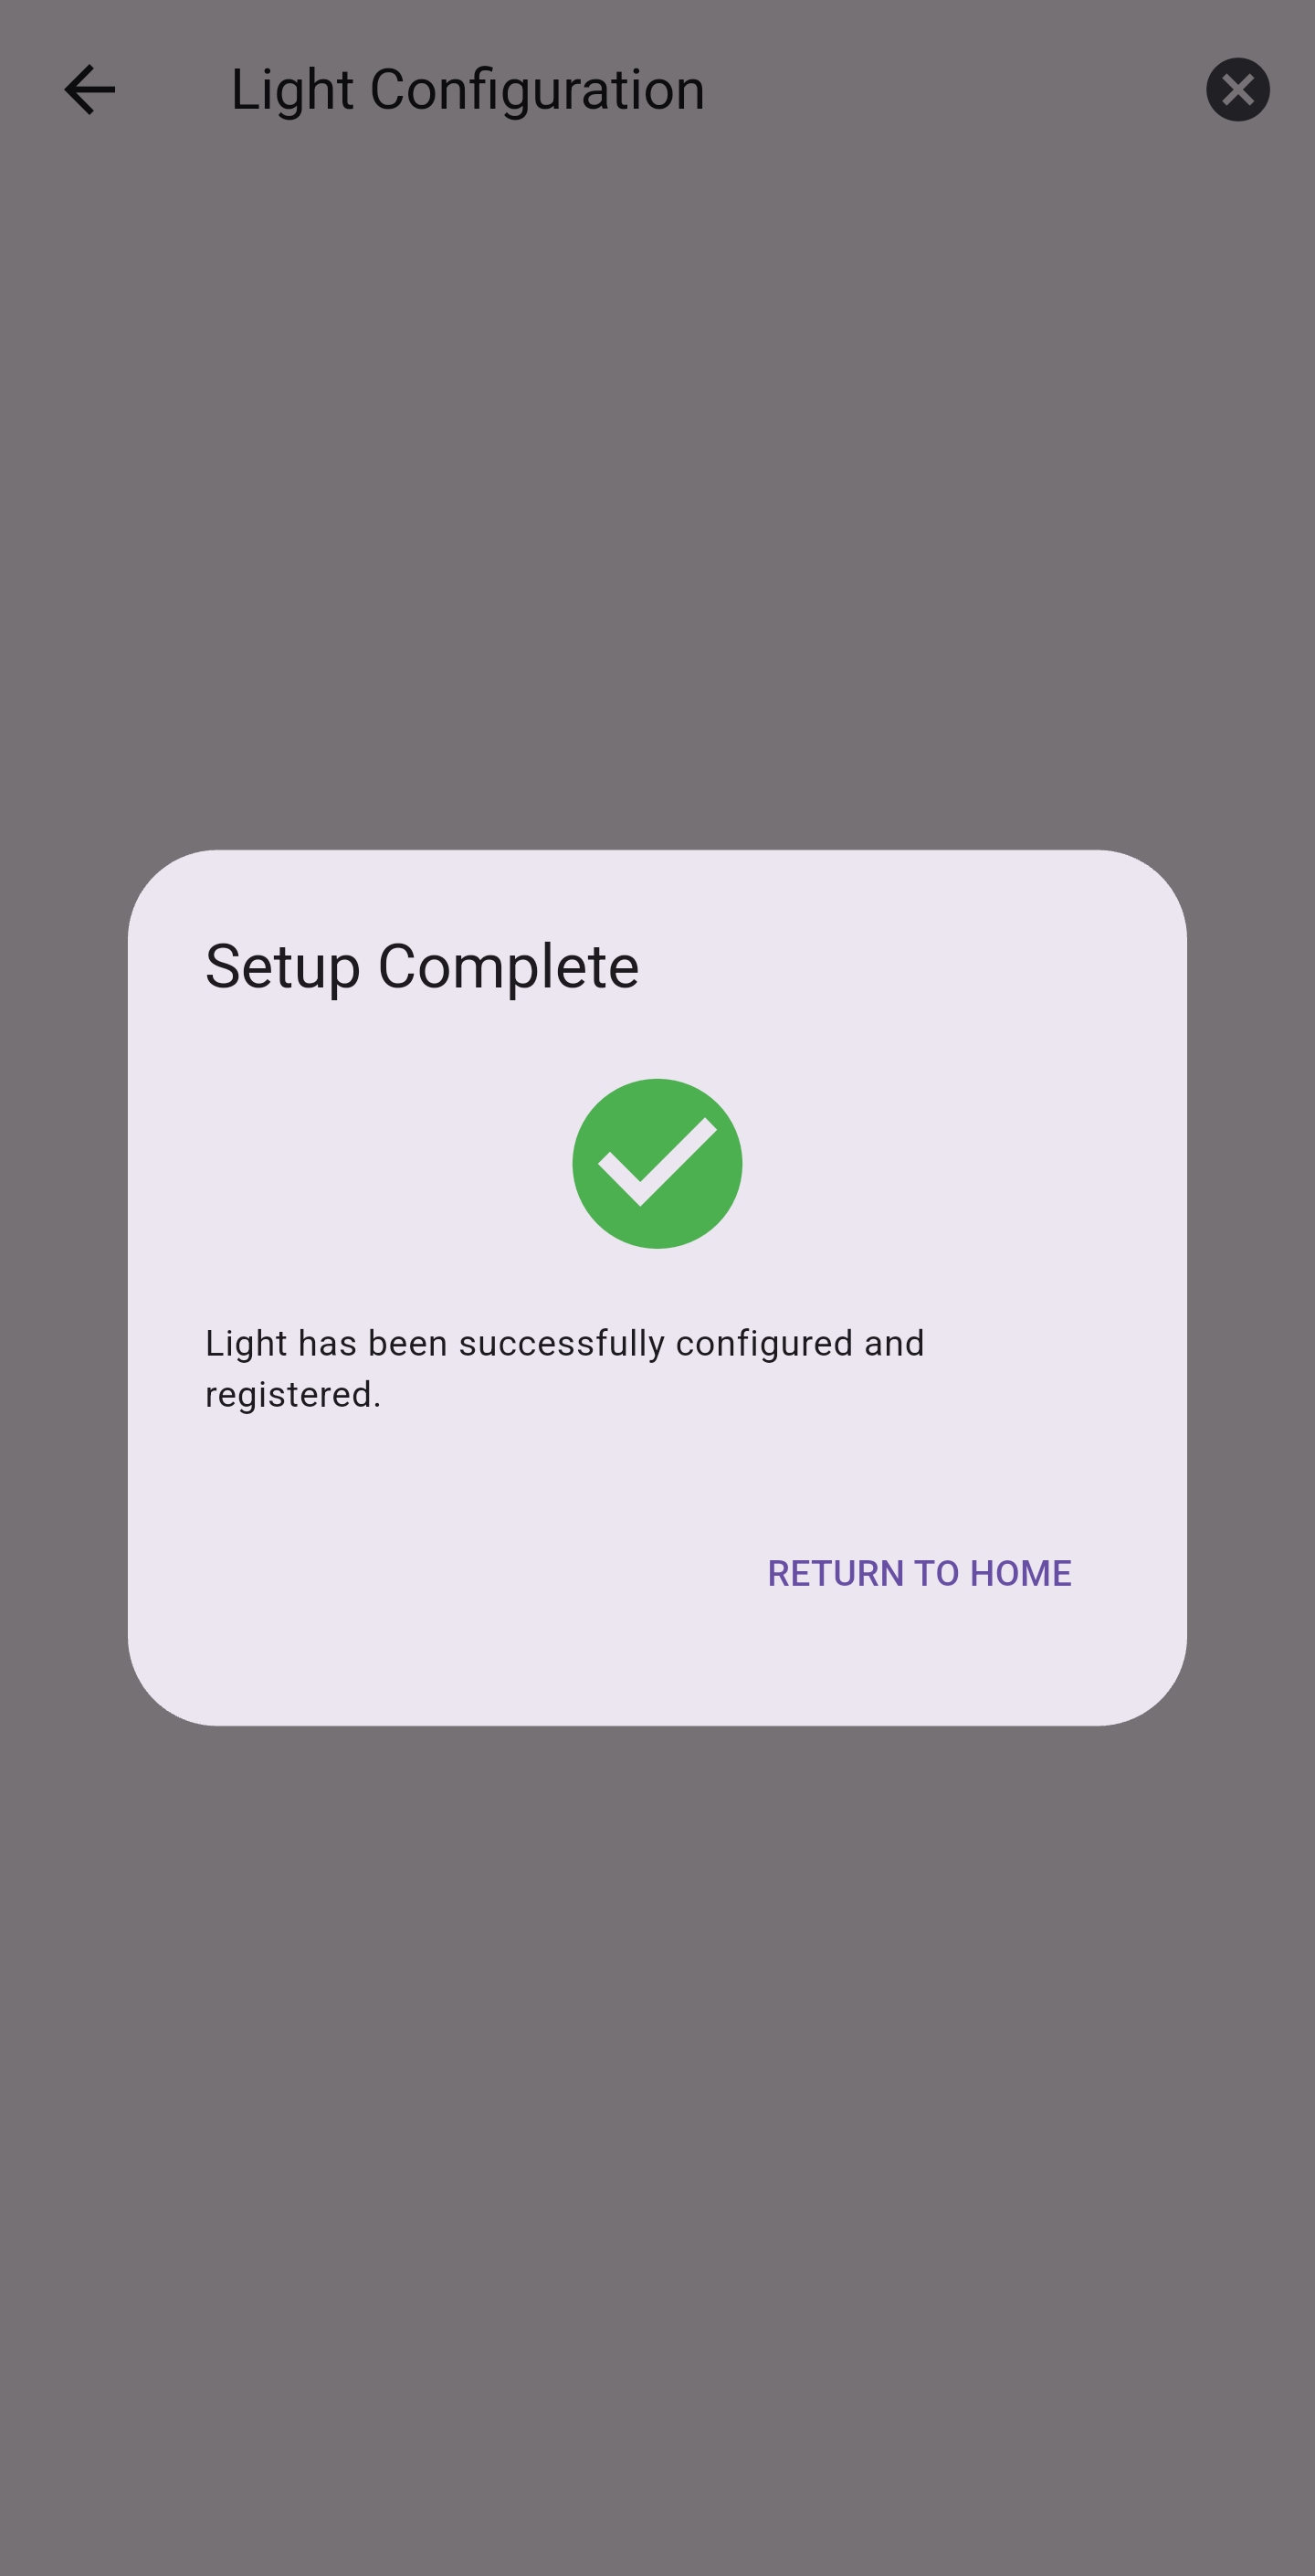
Step 7: Setup Complete
When setup is successful, you'll see a confirmation message:
- The light has been registered in the RCAMS system
- The light is connected to your WiFi network
- The light can now receive commands from the RCAMS system
You can tap "Return to Home" or proceed to control the light.
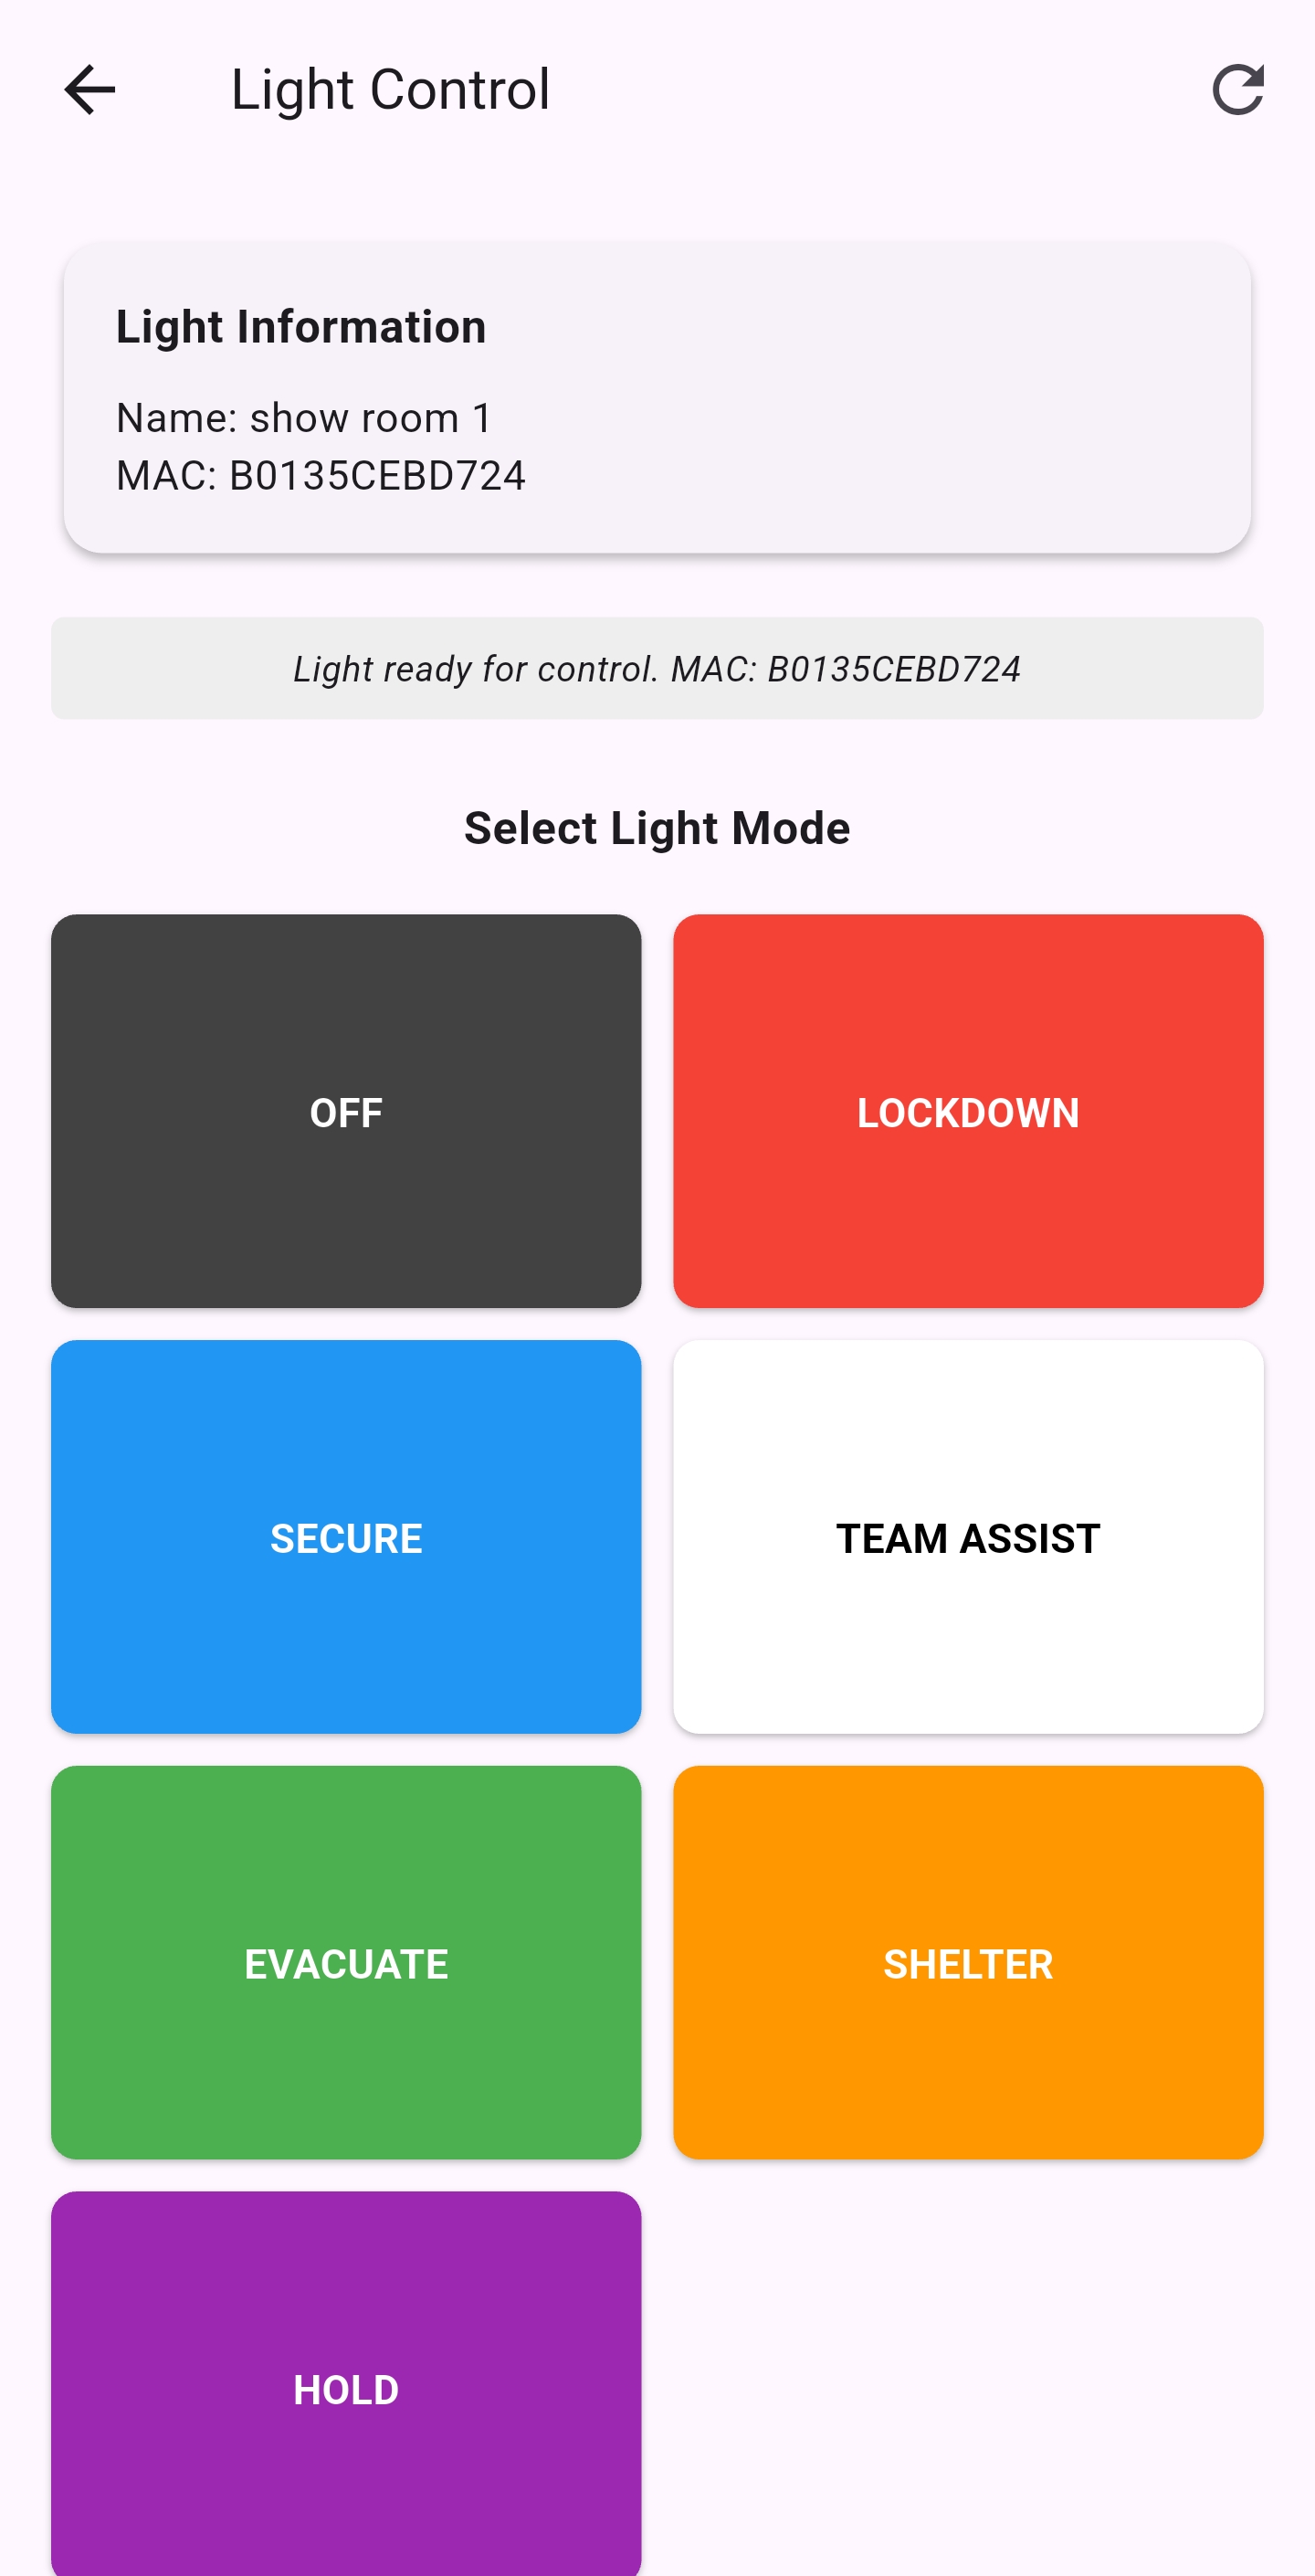
Step 8: Light Control
The Light Control screen allows you to test the light's functionality:
- View the light's name and MAC address
- Select a mode to test (e.g., Lockdown, Secure, Evacuate)
- Each mode corresponds to a different emergency protocol
- Tap a mode button to send that command to the light
Testing confirms that the light is properly connected and responding to commands.
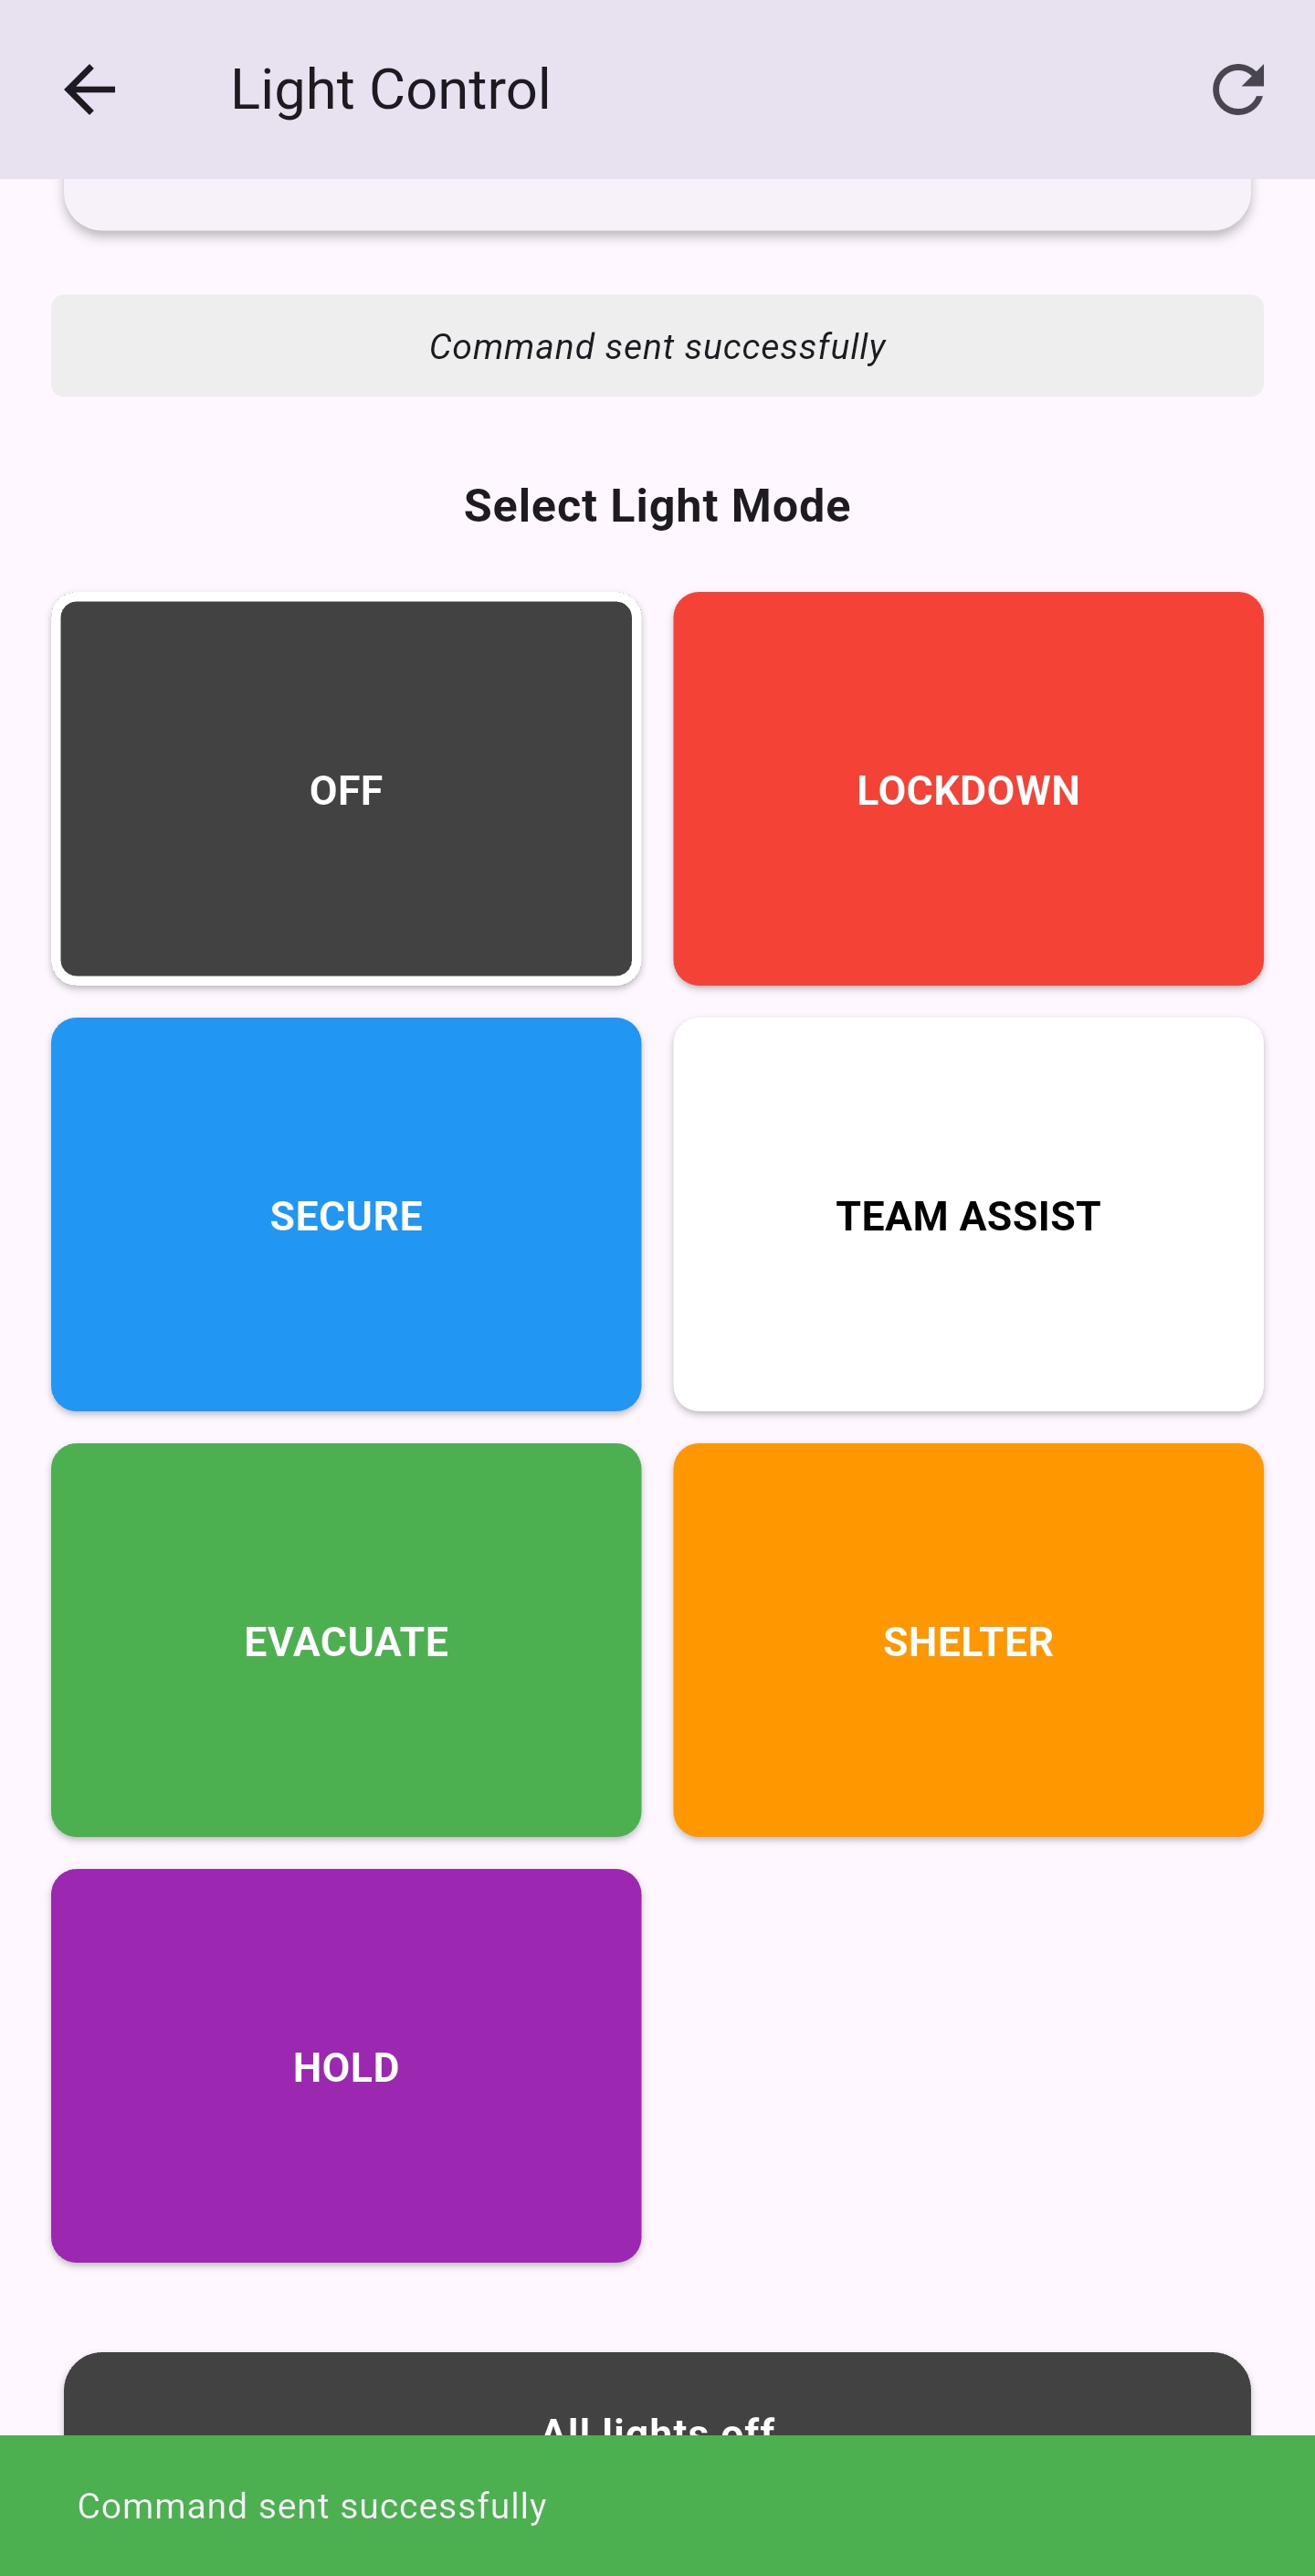
Step 9: Verify Light Mode
When a command is sent, the app confirms the light status:
- A confirmation message appears when a command is sent
- The physical light should display the corresponding color
- You can test different modes to ensure all colors work properly
Use "OFF" to turn off the light when testing is complete.
Troubleshooting
If you encounter issues during the setup process, try these troubleshooting steps:
Common Issues and Solutions
| Issue | Solution |
|---|---|
| Light device not found during setup |
|
| Light fails to connect to WiFi |
|
| Battery lights flash twice every 5 seconds |
|
| API submission fails during setup |
|
| "Test Last Added Light" option not working |
|
| Light connects but later disconnects |
|
| App crashes during setup |
|
Note: If you continue to experience issues, please contact RCAMS support at jacob@spheronomics.com or call (214) 562-5988.